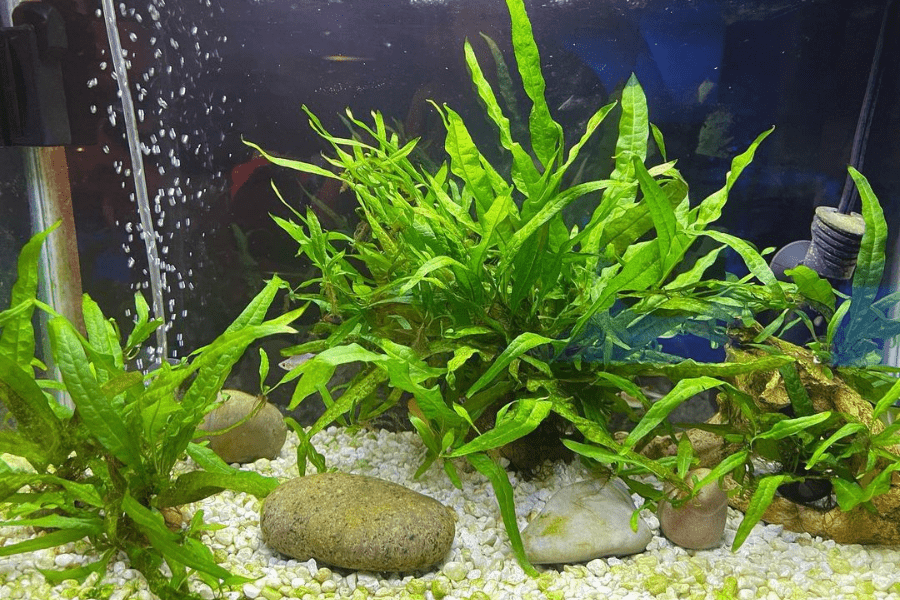
Java ferns are often preferred by aquarists due to their hardiness, appearance, and ability to coexist with a large range of aquarium inhabitants. In this article, we’ll be going into detail as to what truly makes this plant special, as well as how to plant and care for it.
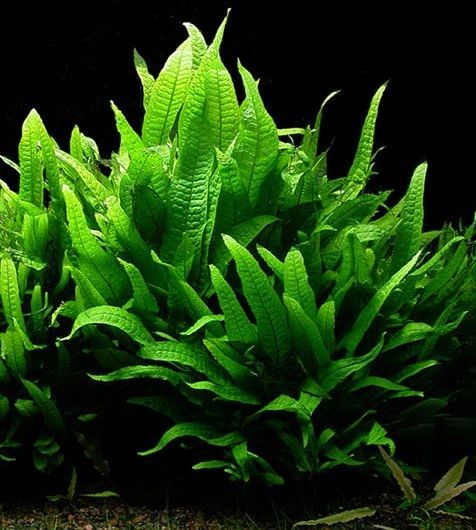
Java ferns, due to selective breeding, can come in several varieties ranging from long bushy leaves to needle-like leaves, but they typically have wavy medium-dark green leaves.
Java ferns are fairly easy to plant and care for since they require no substrate and can absorb nutrients straight from the water without using fertilizers.
Before moving on to the planting and maintenance process, let’s first have a closer look at the java fern to see what really makes them so special.
What Are Java Ferns?
Java ferns are a type of fern, meaning that they’re vascular plants that reproduce via spores, not seeds or flowers.
The java fern specifically is a type of fern native to Southeast Asia.
In nature, java ferns can be found growing by tree trunks, on rocks or wood, and on the roots adjacent to rivers and waterfalls, where they are grown either partially or fully submerged in water.
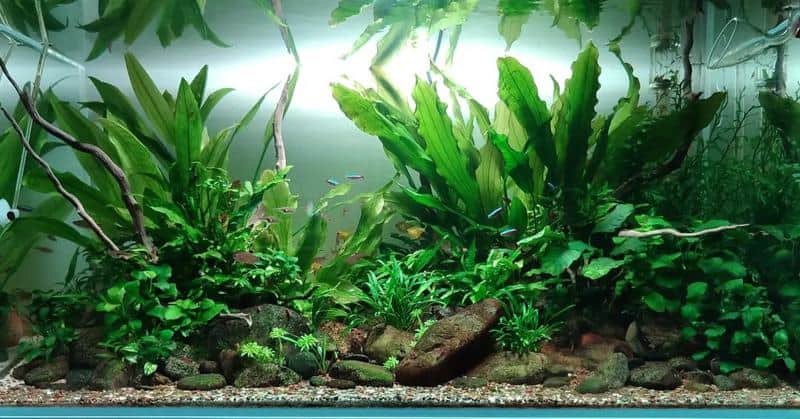
In an aquarium setting, java ferns can be grown in almost any freshwater condition, where they often provide decent hiding and resting areas for your other tank inhabitants. This, along with the fact that they require little maintenance and care, makes the java fern highly desirable to beginner and experienced aquarists alike.
Java Fern Structure
The typical java fern consists of long, wavy leaves that can vary in color from medium to dark green. Some leaves may have black lines running through them, which is completely normal, or have black bumps on the surface, which indicate new java ferns getting ready to sprout.
A java fern’s structure can be separated into three parts:
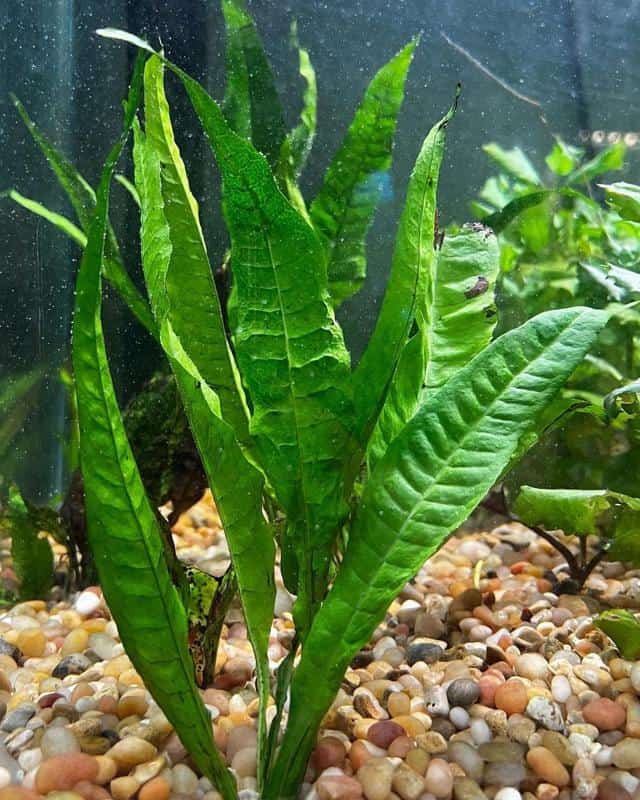
Leaves – the leaves may be anywhere from ¼ inch to 12 inches long. Typically, these leaves are long, narrow, pointed, and of bright green color.
Rhizome – rhizomes look similar to green roots, but are actually the stems of the plant. They will grow along the surface of anything the java fern is attached to.
Leaves grow above the rhizome while roots grow below.
This structure is primarily responsible for the absorption of water and nutrients that the plant needs.
Roots – the roots of java ferns are usually dark brown and grow beneath the rhizome. These roots work by anchoring the plant to an object, such as a log or a rock so that the plant doesn’t remain floating in the water or get swept away.
Java Fern Light Requirements
Java ferns only require low light, something that can often be detrimental to other aquarium plants. Though they can tolerate and may grow faster under brighter/medium lighting, this is not required, making java ferns ideal for low-light habitats.
Java Fern Temperature and pH Requirements
The optimum water temperature and pH level for growing java ferns are between 68 and 82 degrees Fahrenheit (20 to 28 degrees Celsius), and between 6.0 and 7.5 respectively. Java ferns have been seen growing in both hard and soft water.
Java Fern’s Growth Rate
Java ferns grow at a relatively slow to moderate rate (roughly one inch per month) until it reaches their full height, which can range anywhere from 6 to 13 inches.
Because java ferns are often purchased when they’re about 3 or 4 inches tall, it usually takes at most a year’s time before they reach their maximum height.
As with many plants, the more nutrients, light, and CO2 the java fern receives, the faster it’ll grow. Therefore, even though low light is enough for this plant, medium amounts of light are acceptable as well.
With an overall slow growth rate, there’s usually little need for continuous pruning or rearranging of the leaves.
How to Plant and Care for Java Ferns
Java ferns are known to be easy to plant and care for, however, there are a few tips you should be aware of in order to make the most out of your plant.
The Necessary Tank Setup
Before planting the java ferns, you should be aware that the tank itself should resemble the plants’ natural habitat as closely as possible to achieve maximum growth. Here are some recommended settings you should make to your tank:
- Tank should hold at least 10 gallons of water to allow sufficient room
- Water temperature should be between 68 and 82 degrees Fahrenheit
- Water pH should be within 6.0 to 7.5 (though they can survive in pH up to 8.0)
- Low to moderate lighting (avoid high lighting, which can damage the plant and impede growth)
- Other plants (not necessary, but java ferns can survive with other plants that favor tropical/temperate environments)
Java ferns don’t require CO2 as long as your tank filters and powerheads are functioning normally. They also don’t require a substrate, making them a great option for bare-bottom and low-light aquariums.
Planting the Java Fern
Java ferns don’t require a substrate to grow, so you don’t need to plant it in anything and can simply drop it into the aquarium for it to begin growing. Though simple, aquarists often like to position the plant in a particular fashion to suit their individual needs.
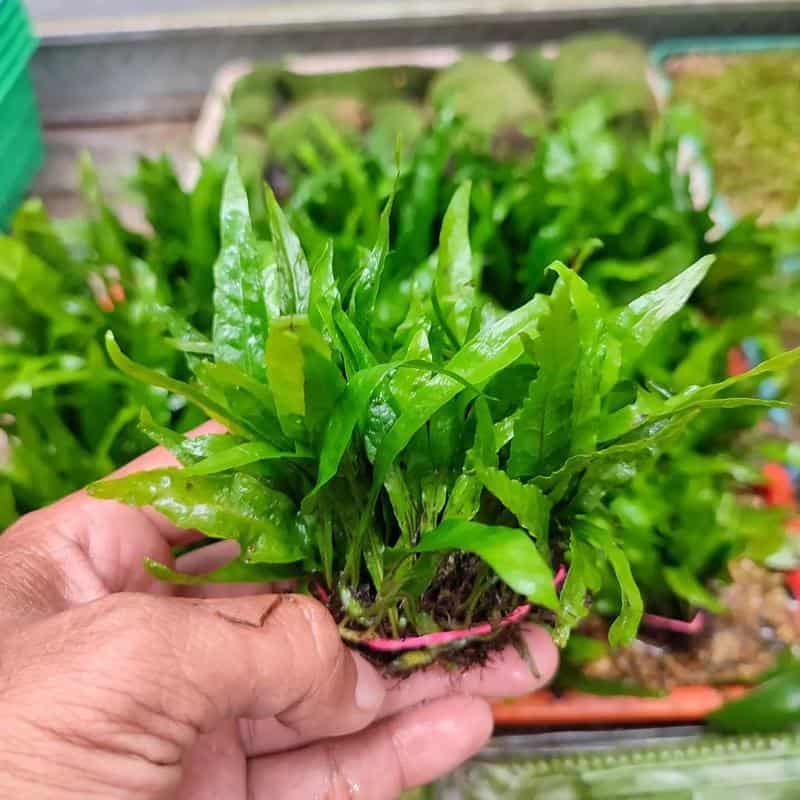
Instead of rooting themselves in a type of substrate like most other aquarium plants, java ferns use their rhizomes to attach and anchor themselves onto different objects and surfaces, such as a piece of driftwood, a rock, or some other type of aquarium décor. They may bind better to objects with hard surfaces, such as lava rock, or larger surfaces, which provide more room to spread.
Because java ferns will take time to attach themselves, you may use materials such as string, glue, plant weights, thread, nylon fishing line, or even zip ties to attach the plant’s rhizomes to the objects in the meantime. Afterward, you can place the attached plant into the tank.
Wait a few weeks for the rhizomes to securely hold onto the objects themselves, after which you may cut and remove the artificial attachments.
Caring for Java Ferns
One of the main reasons why java ferns are so common in household aquariums is the fact that they’re very easy to care for. However, fertilizer and algae eaters can sometimes be added if the plants aren’t growing sufficiently.
Adding Algae Eaters to the Tank
Because java ferns absorb nutrients straight from the water through their leaves, fertilizer is usually not required if the aquarium can naturally provide enough nutrients on its own.
If the water becomes too dirty, however, you can try adding some algae eaters, such as the bristlenose pleco or whiptail catfish, to the tank in order to remove any algae competing with your plants for nutrients.
Supplementing Plant Fertilizers to Promote Growth
Since java ferns are naturally slow-growing plants, don’t be surprised if you don’t see any significant growth right away.
However, if your plants still aren’t growing after a few weeks in the water, you may consider adding some aquarium plant fertilizers or supplements to your habitat (note that substrate fertilizers won’t help since java ferns don’t root in any substrate).
Managing its Growth
While your plant is growing, you may wish to style it in a particular way that best suits your preferences, or simply let it grow on its own to eventually form a miniature underwater forest.
Either way, it’s important that you remove any dead leaves on your java ferns in order to prevent them from rotting and disturbing the water chemistry.
Propagating Java Ferns
Perhaps the easiest way to propagate your java fern is to simply step back and allow the plant to do it itself. You may also do so yourself by cutting and placing the rhizomes or leaves wherever you’d like.
Doing So Naturally
You’ll usually be able to tell when a java fern is beginning to propagate by looking at the tips of its leaves. When the tips begin to turn black or brown, or you notice these darker spots on the leaves themselves, it means the plant is developing plantlets.
Over time, these plantlets will fall off, find somewhere to attach to, and grow on its own. Once this happens, the leaf that the plantlets fell from will eventually darken and die (you can alternatively prune the leaf once the plantlet falls off to prevent wasting plant energy).
Propagating the Plant Yourself
If you wish to have a bit more control over the propagation process (such as where you’d like the new plant to grow), you may propagate the plant yourself.
One way of doing so is to cut the rhizomes in half from one plant before anchoring the cuttings onto another object in the aquarium. This allows you to grow the new plant using the original source.
Another way of propagating the plant is to cut the new java ferns from the leaves of their parents, after which you may place them anywhere you’d see fit in the aquarium using whichever anchoring method you’d prefer.
Read More:
- Best Aquarium Plants That Grow Tall
- Best Aquarium Plants to Reduce Nitrates
- Best Easy Aquarium Plants for Beginners
- Low Light Aquarium Plants
- Best Aquarium Plants for a Sandy Substrate
FAQs
1. What Are Some Issues You May Come Across When Planting Java Ferns?
The Leaves Are Beginning to Become Transparent or Change Shape
Even though black or brown spots on the leaves are good indicators that the plant is beginning to self-propagate, seeing the leaves turn transparent is another story.
Typically, when this happens, it means that the plant is receiving too much light or that the light its receiving is too intense. If this happens, make sure to reduce the light intensity or duration so that the plant has ample time to recover.
The Plant Is Browning
A common problem among new aquarists planting java ferns for the first time is that they often believe the plant needs to be planted on a substrate. Not only is this not the case, but doing so will actually harm the plant.
Though the java fern may not display issues at first, the plant, in its entirety, will begin turning brown. If the plant is browning altogether, it’s often a sign that the plant is sick and dying.
Overall, a java fern’s leaves are usually green and often have a slightly thick and leathery texture. Hence, if the leaves begin to thin or change color entirely, it’s time for you to take a closer look.
Mistaking the Black or Brown Spots for Disease
If you notice black or brown spots on the leaves or leaf tips, don’t worry about them or attempt to diagnose a problem. As mentioned earlier, these are indicators that the plant is beginning to self-propagate (in order words, the plant is thriving).
The Plant Is Affected by Java Fern Melt
If your java fern has either received too much light or not enough nutrients or there’s an abundance of algae in the water, it can go through something known as java fern melt. You’ll notice this if large brown spots start developing over the plant, which eventually will rot the plant and turn it mushy.
Removing the rotting parts and addressing the root of the problem will be the determining factor in whether your plant can recover.
2. Do Java Ferns Need Substrate?
As mentioned earlier, java ferns don’t need to be planted in a substrate to survive. In fact, it’s quite the opposite.
While most aquatic plants need to be rooted in a substrate, the java fern will eventually become sick and potentially die if done the same.
Planting the java fern in any kind of substrate may stunt the growth of the plant as well as the substrate will prevent the plant from absorbing the necessary nutrients it needs to grow.
Conclusion
Java ferns are some of the most popular aquarium plants on the market, and for good reason. As long as you follow the simple guidelines provided in this article, you should have no problem turning your tank into a lush underwater forest in no time.